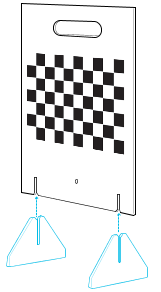
Attach the base supports to the calibration board.
Attach an assembled Rover module to the calibration board under the chessboard pattern using the screw included in the box. Note:
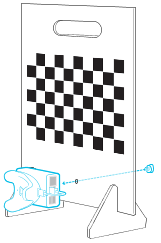
- Make sure the Rover module is securely attached to the calibration board. Any gaps between the board and the module may effect calibration.
- The in-box screw has an interior screw thread so you can install the Rover module and calibration board to a tripod for greater precision during calibration.
Place the calibration board inside the tracking area at the same height as the camera, with the camera facing the board at a 90-degree angle. Note:
See Example virtual production studio setup for details.
Make sure the calibration board doesn't obscure the Rover module from the base stations after rotating it 45 degrees in either direction. This will be important during camera calibration.