On the Mars dashboard, tap Settings and check your firmware version. Make sure you have Mars firmware 2.03.999.1 or later installed.

For details on how to update the firmware, see Manually updating the Mars firmware.
On the Mars dashboard, tap Network (or tap the Mars IP when the network is active), and then tap Camera tracking protocols.


Turn on FreeD and enter your computer's IP address. Press Apply to enable the setting.

On your computer, launch Aximmetry. The Startup Configuration window will be displayed.
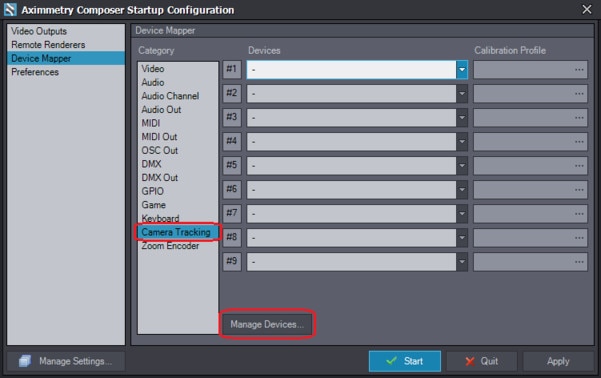
Click Device Mapper in the left pane.
Under Category, select Camera Tracking, and then click Manage Devices.
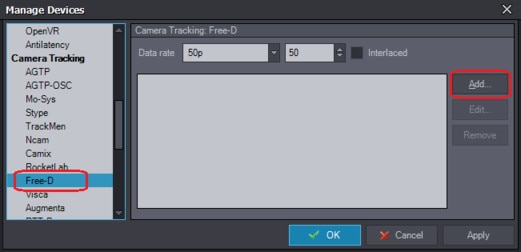
In the Manage Devices dialog box, select Free-D under Camera Tracking, and then click Add. The Add Device dialog box will be displayed.
In the UDP port field, enter the port number that appears under FreeD on the Camera tracking protocols screen on the Mars dashboard.
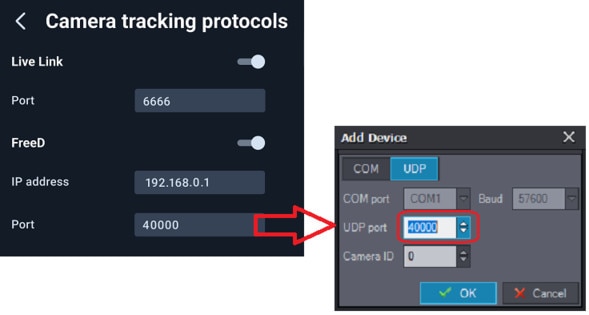
In the Camera ID field, select 1 to associate it with Rover 1's Ethernet port on Mars, and then click OK.
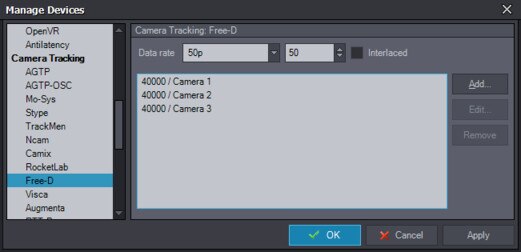
Repeat steps 7 to 9 to add Rover 2 and Rover 3. In the Camera ID field, select 2 and 3 respectively.
Open Device Mapper. Go to Camera Tracking>Calibration Profile. In the Profile Window, select <file…> and browse to the file you exported from the Calibration Tool.


In Aximmetry Open any project, got to Input, Select Studio, & press recenter on the ground rover. The virtual grid and pole should land on the on the center of the Rover.

Pan your camera around to see if the virtual grid & pole sticks to the base of the tracker.


Shift the Base Cam Transform 5 cm downward so its .05meter. so that the base of the green screen stage matches up with the Bottom of the Recentered Rover.

In Scene Tab make sure not to mess with the height of Stage unless the scene’s floor actually has a raised floor.
