The Camera Calibration Tool captures images to generate calibration data that you can import into your virtual production engine to calibrate your camera.
If you haven't downloaded the Camera Calibration Tool, visit www.vive.com/mars/cct.
-
Attach a Rover module to your camera, with the front side of Rover parallel to the camera lens.
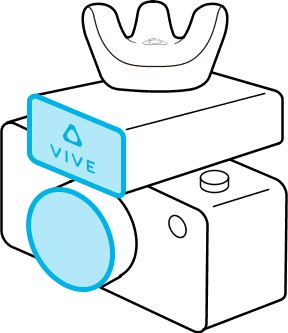
Note: The internal screw thread on the bottom of Rover has a depth of 5.5 mm. To avoid damaging Rover or your camera during installation, make sure the exterior screw thread on your camera is no longer than 4.5 mm.
-
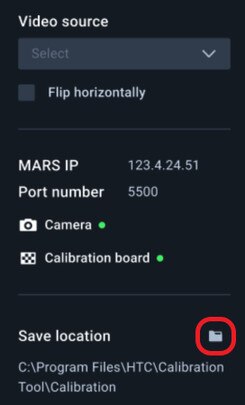
On your PC, open the Camera Calibration Tool, enter the Mars IP and port number, and then click Connect.


<aside>
💡 Tip: You can find the Mars IP on the Mars dashboard. See Mars for details.
</aside>
-
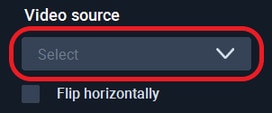
Select your video capture device from the Video source dropdown menu.
<aside>
💡 Tip: If the video feed is inverted on the x-axis, you can select Flip horizontally to correct it.
</aside>
-
For Save location, click the folder icon and select a destination folder for the images and calibration data.
-
Click the play button to start the calibration process.
-
Move the camera so the chessboard pattern falls inside the red frame.
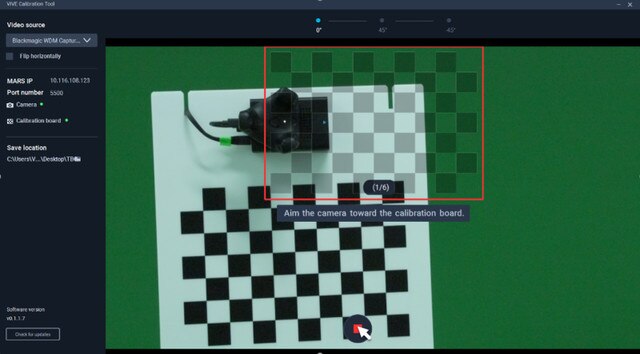
The frame will turn blue, and the Camera Calibration Tool will capture an image.
-
Move the camera as needed to capture additional images until you're prompted to rotate the calibration board.
-
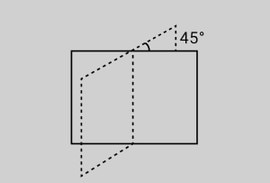
Rotate the calibration board 45 degrees (counterclockwise), then click Continue and capture a second set of images. After capturing the second set of images, you'll be prompted to rotate the board 45 degrees in the opposite direction.
-
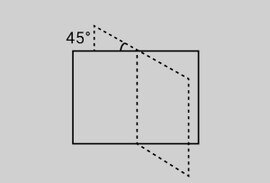
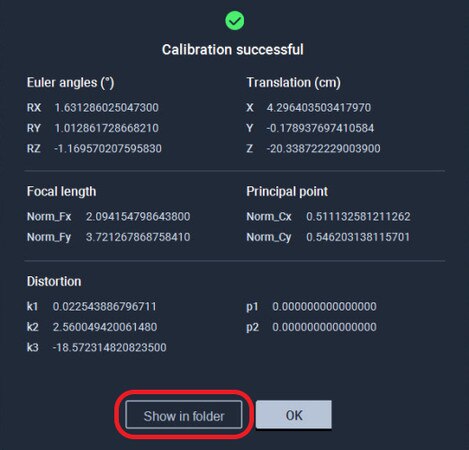
Rotate the calibration board 45 degrees clockwise (-45 degrees), click Continue, and then capture the third and final set of images. The Camera Calibration Tool will process the images and display the results. Click Show in folderto open the save location containing the images and calibration data.
-
Import the calibration data into your virtual production engine to calibrate your camera.
For details, see Importing calibration data into Unreal Engine.
https://www.youtube.com/watch?v=7U2vE-Zpg5o&t=257s
https://embed.notionlytics.com/wt/ZXlKM2IzSnJjM0JoWTJWVWNtRmphMlZ5U1dRaU9pSnZjRlk0UVVOa2JFSndhemhYWmxvek1tYzVaU0lzSW5CaFoyVkpaQ0k2SWpFellXRmtOR1E0WlROa01EUXdZVFpoWldRNE5XWXdNVGt5WXpneVpHUXlJbjA9